
Azure Kubernetes Service (AKS) enabled by Azure Arc is a managed Kubernetes service that you can use to deploy and manage containerized applications on-premises, in datacenters, or at edge locations such as retail stores or manufacturing plants.
AKS enabled by Azure Arc reduces the complexity and operational overhead of managing Kubernetes by shifting that responsibility to Azure. When you create an AKS enabled by Azure Arc cluster, it’s automatically connected to Azure Arc for centralized management. By managing all of your Kubernetes resources in a single control plane on Azure, you can enable a more consistent development and operator experience to run cloud-native apps anywhere and on any infrastructure option.
AKS enabled by Azure Arc provides the following features:
- Supports running Kubernetes clusters on-premises, on the edge, or in other cloud environments. This provides flexibility to meet specific business or technical requirements.
- A consistent experience for managing Kubernetes clusters across different infrastructures, similar to the experience you get with AKS in Azure.
- Centralized management of Kubernetes clusters through the Azure portal, regardless of where they are hosted. This includes monitoring, updating, and scaling clusters.
- Extends Azure security and governance capabilities to Kubernetes clusters running anywhere. You can apply Azure Policy for governance and use Azure Security Center for security monitoring and threat detection.
- Integrates with various Azure services such as Azure Monitor, Azure Policy, and Azure Security Center, providing a seamless experience for operations and management.
- Supports GitOps for configuration management and continuous deployment practices. This enables automated and consistent deployment processes.
AKS enabled by Azure Arc, see the following deployment option overviews:
Set up an Azure Kubernetes Service host on Azure Stack HCI and Windows Server and deploy a workload cluster using Windows Admin Center
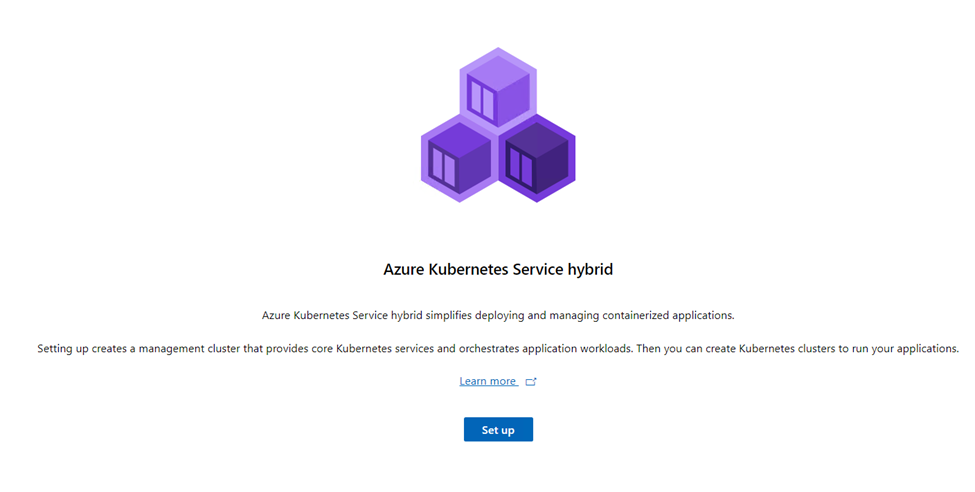
Select Set up to launch the Setup wizard.
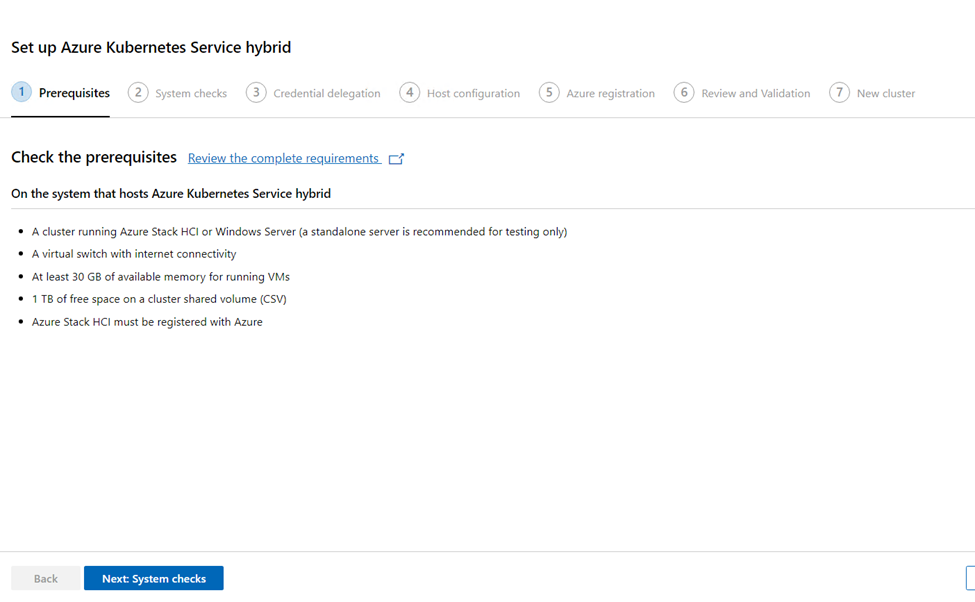
Review the prerequisites for the machine on which you’re running Windows Admin Center, on the cluster to which you’re connected, and the network. Additionally, make sure you’re signed into an Azure account on Windows Admin Center and that the Azure subscription you’re planning on using isn’t expired. You must have the Owner role on the subscription you are planning on using. When you’re finished, select Next.
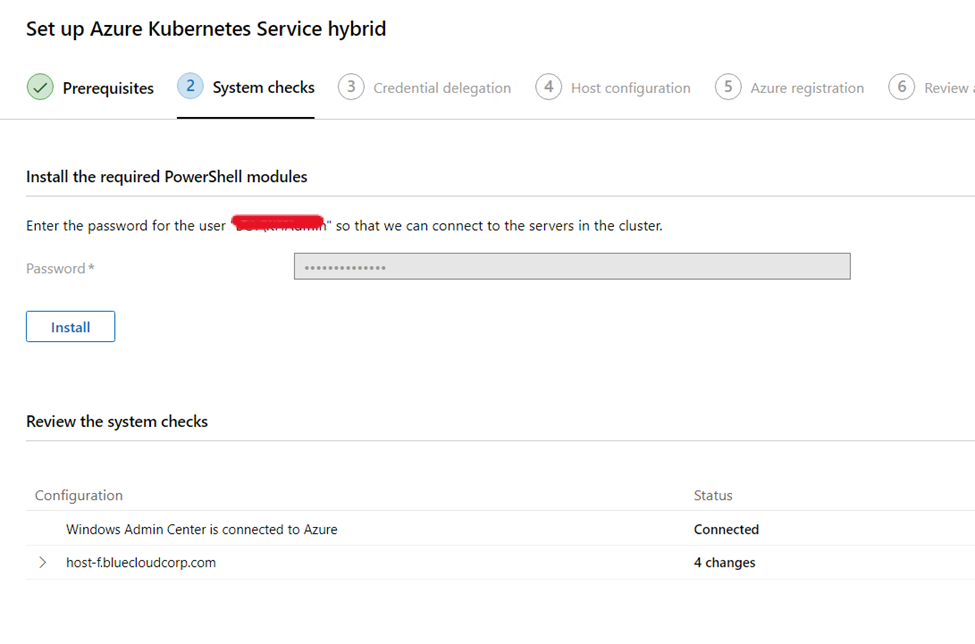
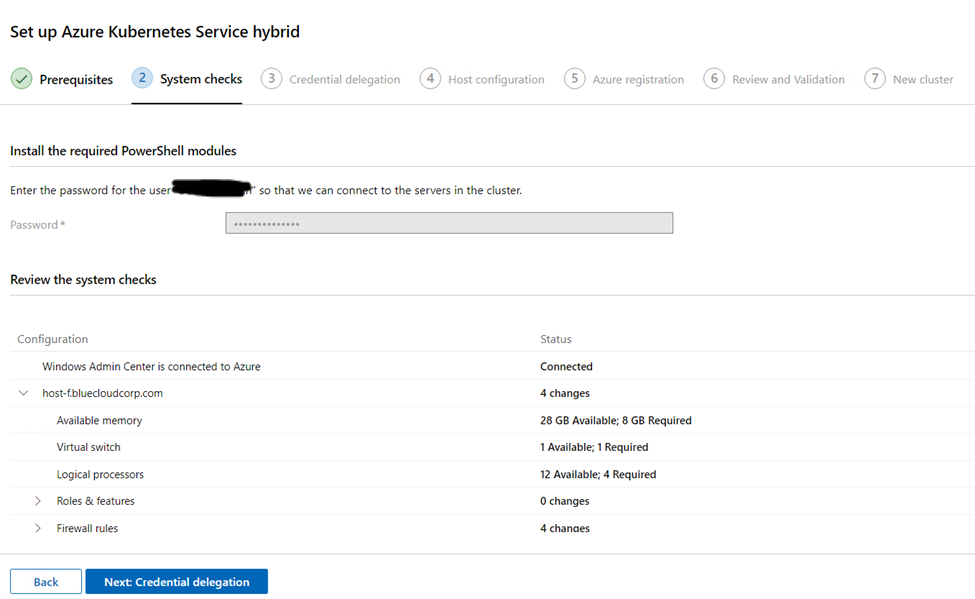
On the System checks page of the wizard, take any required actions, such as connecting your Windows Admin Center gateway to Azure. When connecting your Windows Admin Center gateway to Azure, be sure to create a new Microsoft Entra application. This step checks that Windows Admin Center and the system that hosts AKS have the proper configuration to continue. When you’re finished taking action, select Next.
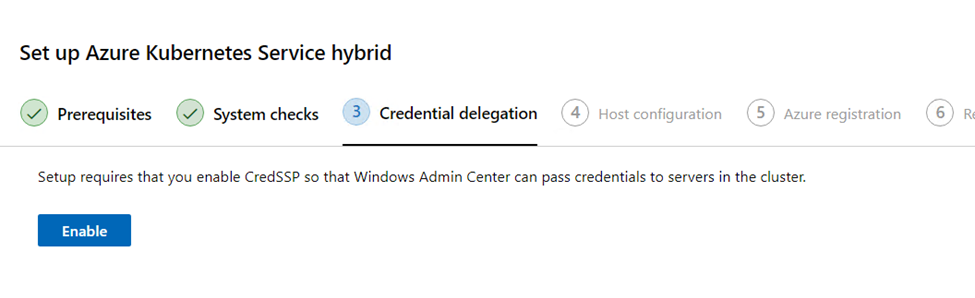
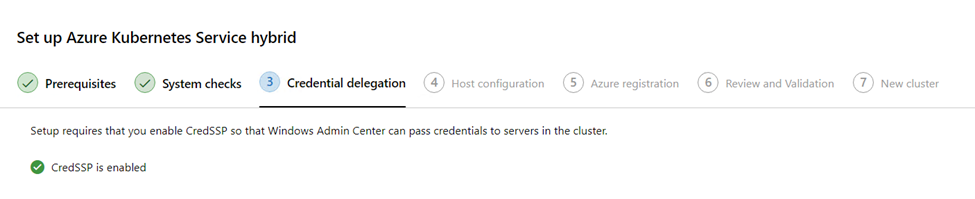
Ensure system connectivity through CredSSP in the Connectivity step. CredSSP lets Windows Admin Center delegate the user’s credentials from the gateway to a target server for remote authentication. CredSSP must be enabled to set up AKS. After you enable CredSSP, select Next.
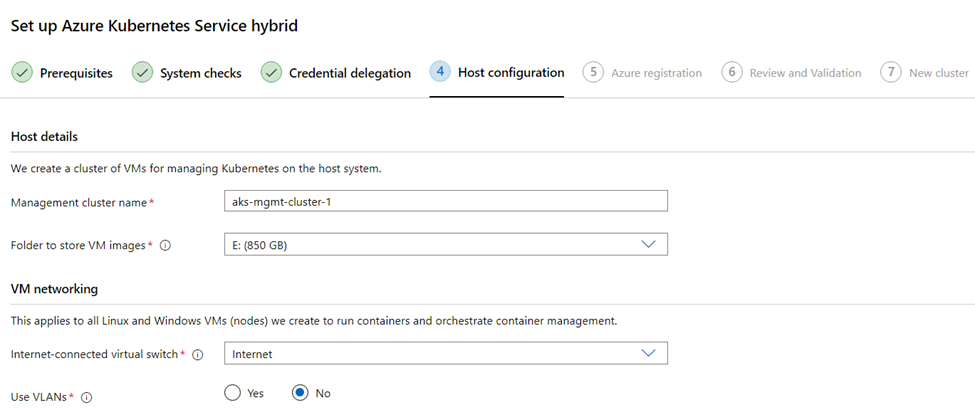
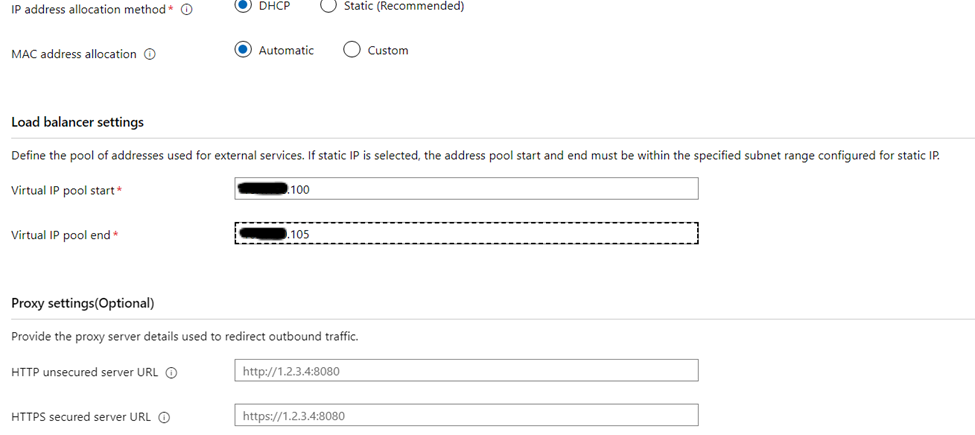
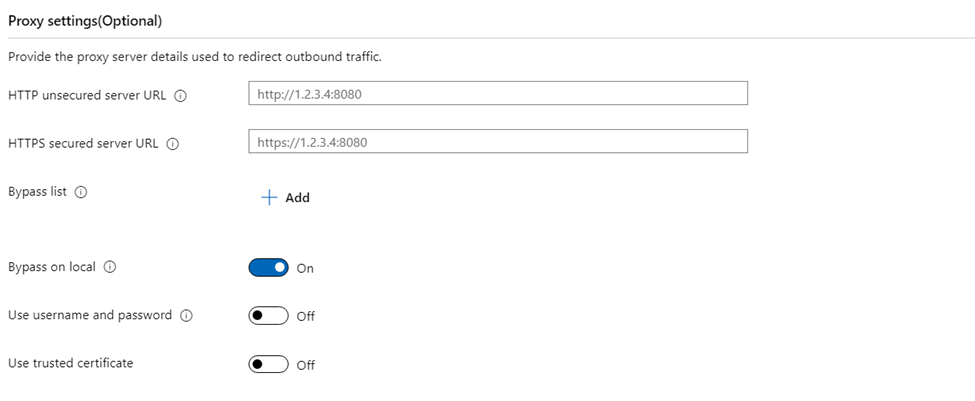
Configure the machine that hosts AKS in the Host configuration step. We recommend that you select automatically download updates in this section. This step of the wizard asks you to configure the following details:
- Host details, such as a name for the AKS host cluster and an image directory where VM images are stored. The image directory must point to a shared storage path or an SMB share that is accessible by the host machine.
- Kubernetes node networking, which serves as the default for the AKS host and all Linux and Windows Kubernetes nodes VMs that are created to run containers and orchestrate container management.
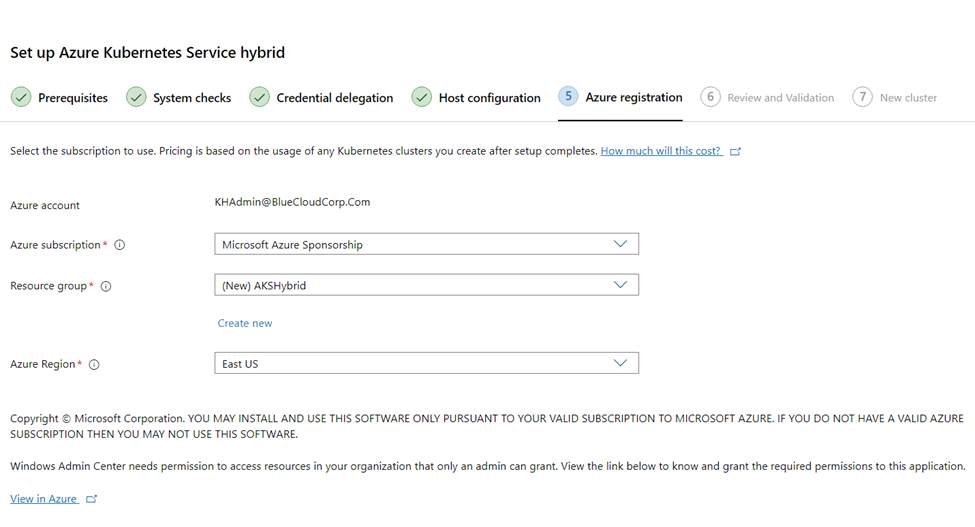
On the Azure Registration page of the wizard, provide details about the subscription, resource group, and region you want to use for this service. Your resource group must be in the Australia East, East US, Southeast Asia, or West Europe region.
Windows Admin Center requires permissions to access resources in your organization that only an admin can grant. Select View in Azure to view your Windows Admin Center gateway in Azure and confirm you were granted admin consent for the following services:
- Azure Service Management: user_impersonation
- Microsoft Graph: Application.ReadWrite.All
- Microsoft Graph: Directory.AccessAsUser.All
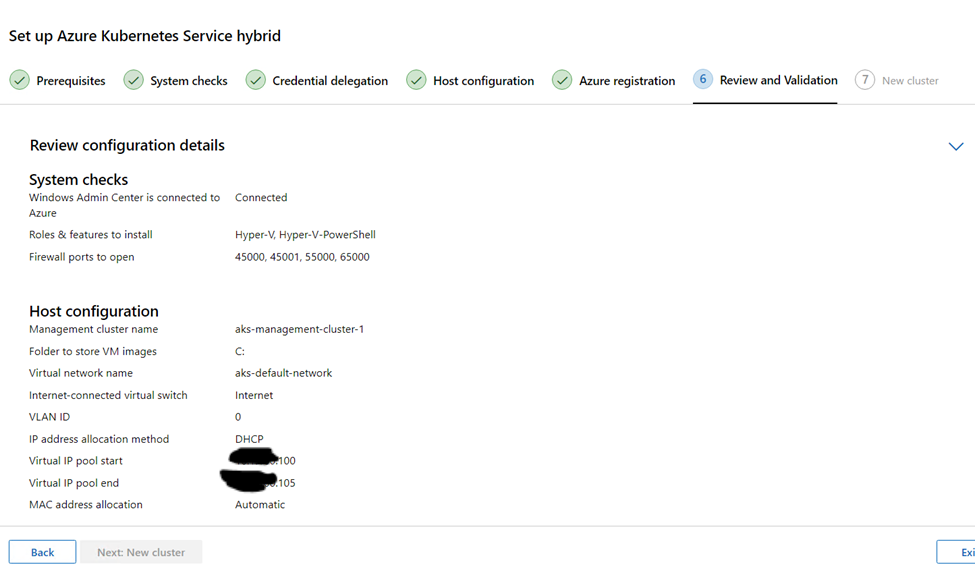
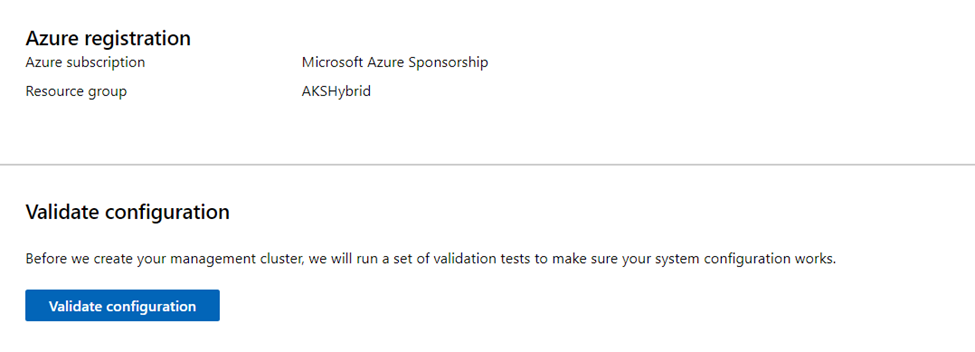
Review all of your selections in the Review + create step. If you’re satisfied with your selections, select Next: new cluster to begin host setup.
Set up an Azure Kubernetes Service host on Azure Stack HCI and Windows Server and deploy a workload cluster using PowerShell
The following steps guides you through setting up an Azure Kubernetes Service (AKS) host. You create Kubernetes clusters on Azure Stack HCI and Windows Server using PowerShell
Install the AksHci PowerShell module
Close all open PowerShell windows, open a new PowerShell session as administrator, and run the following command on all nodes in your Azure Stack HCI or Windows Server cluster:
Install-PackageProvider -Name NuGet -Force
Install-Module -Name PowershellGet -Force -Confirm:$false
Install the AKS-HCI PowerShell module by running the following command on all nodes in your Azure Stack HCI or Windows Server cluster:
Install-Module -Name AksHci -Repository PSGallery -Force -AcceptLicense
Register the resource provider to your subscription
Before the registration process, enable the appropriate resource provider in Azure for AKS enabled by Arc registration. To do that, run the following PowerShell commands:
To sign in to Azure, run the Connect-AzAccount PowerShell command:
Connect-AzAccount
Run the following commands to register your Azure subscription to Azure Arc enabled Kubernetes resource providers. This registration process can take up to 10 minutes, but it only needs to be performed once on a specific subscription:
Register-AzResourceProvider -ProviderNamespace Microsoft.Kubernetes
Register-AzResourceProvider -ProviderNamespace Microsoft.KubernetesConfiguration
Register-AzResourceProvider -ProviderNamespace Microsoft.ExtendedLocation
To validate the registration process, run the following PowerShell commands:
Get-AzResourceProvider -ProviderNamespace Microsoft.Kubernetes
Get-AzResourceProvider -ProviderNamespace Microsoft.KubernetesConfiguration
Get-AzResourceProvider -ProviderNamespace Microsoft.ExtendedLocation
Step 1: Prepare your machine(s) for deployment
Initialize-AksHciNode
Step 2: Create a virtual network
Run the following commands on any one node in your Azure Stack HCI and Windows Server cluster.
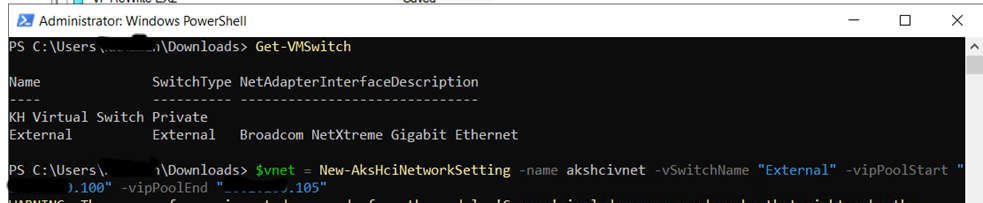
To get the names of your available switches, run the following command. Make sure the SwitchType of your VM switch is “External”:
Get-VMSwitch
To create a virtual network for the nodes in your deployment to use, create an environment variable with the New-AksHciNetworkSetting PowerShell command. This virtual network is used later to configure a deployment that uses static IP.
#static IP
$vnet = New-AksHciNetworkSetting -name myvnet -vSwitchName “extSwitch” -k8sNodeIpPoolStart “172.16.10.1” -k8sNodeIpPoolEnd “172.16.10.255” -vipPoolStart “172.16.255.0” -vipPoolEnd “172.16.255.254” -ipAddressPrefix “172.16.0.0/16” -gateway “172.16.0.1” -dnsServers “172.16.0.1” -vlanId 9
Step 3: Configure your deployment
Run the following commands on any one node in your Azure Stack HCI and Windows Server cluster.
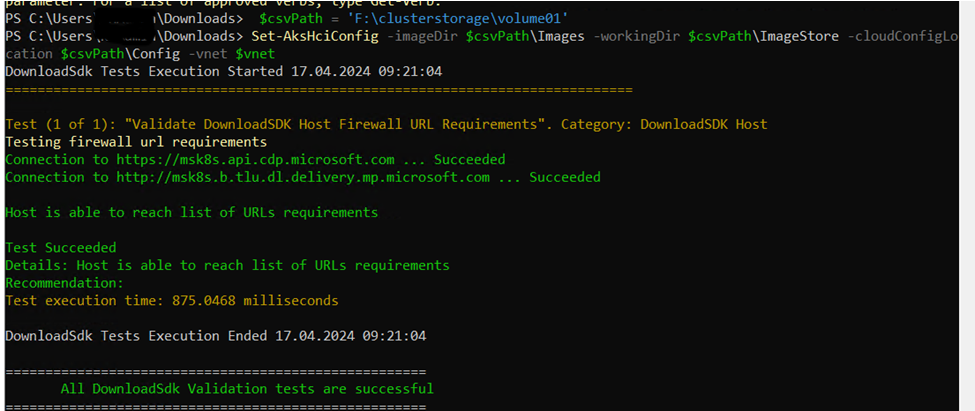
To create the configuration settings for the AKS host, use the Set-AksHciConfig command. You must specify the imageDir, workingDir, and cloudConfigLocation parameters. If you want to reset your configuration details, run the command again with new parameters.
Configure your deployment with the following command:
$csvPath = ‘C:\clusterstorage\volume01’ # Specify your preferred CSV path
Set-AksHciConfig -imageDir $csvPath\Images -workingDir $csvPath\ImageStore -cloudConfigLocation $csvPath\Config -vnet $vnet
Step 4: Sign in to Azure and configure registration settings
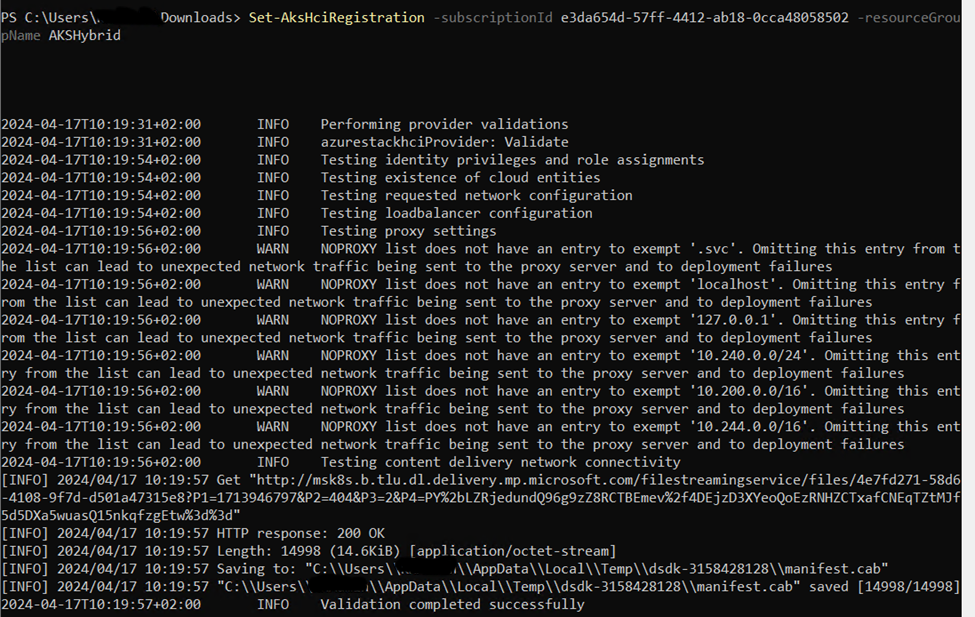
Run the following Set-AksHciRegistration PowerShell command with your subscription and resource group name to sign in to Azure. You must have an Azure subscription, and an existing Azure resource group in the Australia East, East US, Southeast Asia, or West Europe Azure regions:
Set-AksHciRegistration -subscriptionId “<subscriptionId>” -resourceGroupName “<resourceGroupName>”
Step 5: Start a new deployment
Run the following command on any one node in your Azure Stack HCI or Windows Server cluster.
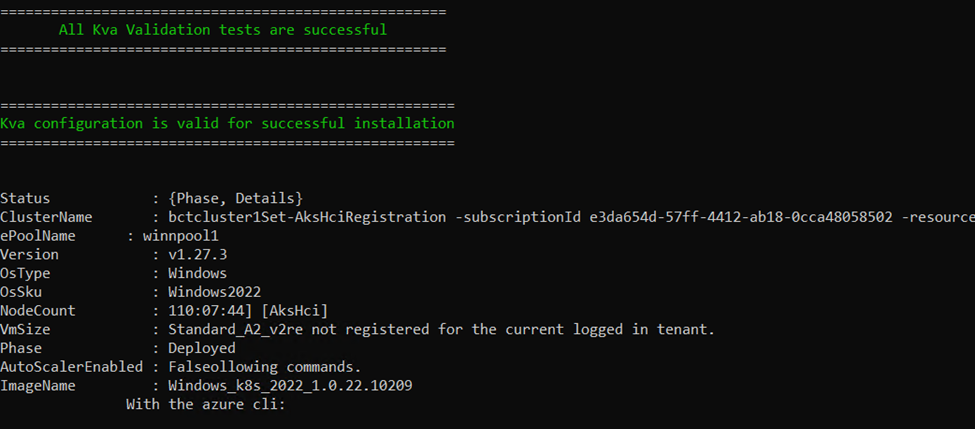
After you configure your deployment, you must start it in order to install the AKS agents/services and the AKS host. To begin deployment, run the following command:
Install-AksHci

Step 6: Create a Kubernetes cluster
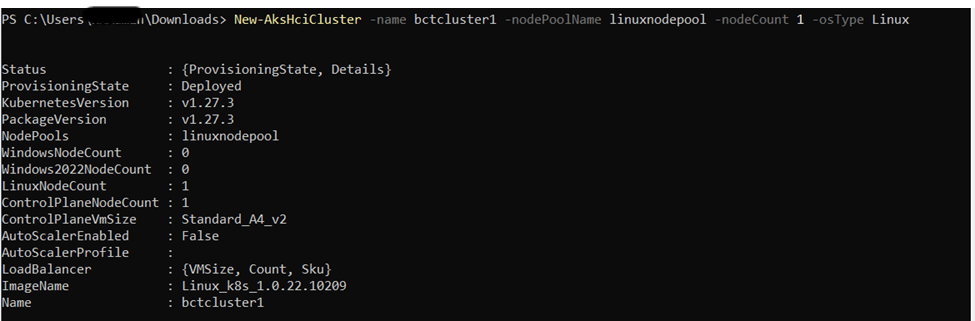
After you install your AKS host, you can deploy a Kubernetes cluster. Open PowerShell as an administrator and run the following New-AksHciCluster command. This example command creates a new Kubernetes cluster with one Linux node pool named linuxnodepool with a node count of 1.
New-AksHciCluster -name mycluster -nodePoolName linuxnodepool -nodeCount 1 -osType Linux
Step 7: Connect your cluster to Arc-enabled Kubernetes
Connect your cluster to Arc-enabled Kubernetes by running the Enable-AksHciArcConnection command. The following example connects your Kubernetes cluster to Arc using the subscription and resource group details you passed in the Set-AksHciRegistration command:
Connect-AzAccount
Enable-AksHciArcConnection -name mycluster
In conclusion, Azure Kubernetes Service (AKS) enabled by Azure Arc represents a transformative solution for modern cloud-native and hybrid cloud strategies. By extending the capabilities of AKS to any environment, Azure Arc provides a unified management experience, enabling seamless deployment, scaling, and management of containerized applications across on-premises, multi-cloud, and edge environments.
The integration of AKS with Azure Arc brings several key benefits:
- Consistency: It ensures a consistent Kubernetes experience and operational consistency across various infrastructures, reducing complexity and operational overhead.
- Scalability: AKS enabled by Arc facilitates scalable and efficient management of distributed clusters, empowering organizations to meet growing and dynamic business demands.
- Security and Compliance: Enhanced security features and governance policies are uniformly applied, aiding in maintaining compliance and protecting data across diverse environments.
- Innovation: Organizations can leverage the latest innovations and best practices in Kubernetes and cloud-native technologies, driving agility and accelerating time-to-market for applications.
By harnessing the power of AKS and Azure Arc, businesses are better equipped to innovate rapidly while maintaining control and oversight of their Kubernetes deployments. This hybrid and multi-cloud approach not only maximizes the flexibility and resource efficiency but also future-proofs infrastructure investments against evolving technological landscapes.
I hope this was informative for you, please let me know your comments.
See you soon
Karim Hamdy
Infrastructure Architect

[…] can refer to our posts on AKS enabled by Azure Arc here and […]
[…] can refer to our posts on AKS enabled by Azure Arc here and […]