Azure Stack HCI (Hyper-Converged Infrastructure) is a hybrid cloud solution from Microsoft that combines on-premises infrastructure with Azure cloud services. It provides a way to modernize your data center by integrating compute, storage, and networking into a single, hyper-converged system.
Azure Stack HCI (Hyper-Converged Infrastructure) has undergone several iterations, with each version bringing new features, enhancements, and improvements. The versions of Azure Stack HCI are typically aligned with updates and innovations from both Windows Server and Azure services.
Azure Stack HCI, version 22H2
Released in 2022, this version introduced further enhancements in hybrid capabilities and management efficiency.
Key Features:
- Azure Arc Integration: Full integration with Azure Arc for unified management across on-premises, edge, and multi-cloud environments.
- Improved Disaster Recovery: Enhanced disaster recovery capabilities with more seamless failover and failback processes.
- Simplified Deployment: Further simplifications in the deployment process, reducing time to value.
- Performance and Scalability: Ongoing improvements to storage and compute performance, allowing for larger and more complex workloads.
- Energy Efficiency: New features aimed at reducing power consumption and improving overall energy efficiency.
Azure Stack HCI, version 22H2
Azure Stack HCI, version 23H2, represents the latest iteration in Microsoft’s line of hyper-converged infrastructure solutions. Building on previous versions, 23H2 continues to integrate on-premises infrastructure with Azure services, offering new features and improvements to enhance performance, security, and manageability.
Key Features of Azure Stack HCI, Version 23H2
- Enhanced Hybrid Cloud Capabilities:
- Azure Arc Integration: Further integration with Azure Arc, allowing for unified management and governance across on-premises, edge, and multi-cloud environments.
- Improved Disaster Recovery: Enhanced disaster recovery features with more streamlined failover and failback processes, ensuring business continuity.
- Performance and Scalability:
- Storage Spaces Direct (S2D): Continued improvements to S2D for better performance and reliability, supporting larger and more complex workloads.
- Advanced Networking: Enhanced networking features, including better support for RDMA, faster data transfer rates, and reduced latency.
- Security Enhancements:
- Secured-Core Server: Enhanced Secured-Core server capabilities to protect against sophisticated threats and ensure compliance with industry standards.
- Improved Threat Detection: Advanced threat detection and response capabilities integrated with Azure Security Center.
- Simplified Management and Deployment:
- Windows Admin Center: Further enhancements to Windows Admin Center for easier deployment, management, and monitoring of HCI clusters.
- Automated Updates: Simplified and more reliable update processes to ensure systems are always up-to-date with the latest features and security patches.
- AI and Machine Learning Integration:
- Azure AI Services: Deeper integration with Azure AI and machine learning services, enabling on-premises data processing and analytics.
- Edge Computing: Improved support for edge scenarios, allowing for more robust data processing at the edge with better integration with IoT devices.
- Energy Efficiency and Sustainability:
- Power Management: New features aimed at reducing power consumption and improving overall energy efficiency, contributing to sustainability goals.
- Green IT Initiatives: Enhanced support for green IT initiatives, including better reporting and management of energy usage.
Deploying Azure Stack HCI, version 22H2, involves several detailed steps. Below is a step-by-step guide to help you through the deployment process.
Prerequisites
- Hardware Requirements:
- Compatible servers listed in the Azure Stack HCI catalog.
- Minimum of two servers.
- Networking components for connectivity and performance needs.
- Software Requirements:
- Windows Admin Center (WAC) installed on a management server.
- Windows Server 2022 Datacenter edition for all nodes.
- Azure subscription for Azure Stack HCI registration.
- Networking:
- Properly configured switches and network interfaces.
- Isolated VLANs for different types of traffic (storage, management, VM).
- Licensing:
- Valid licenses for Windows Server and required software.
Deployment Steps
1. Prepare the Environment
- Update Firmware and BIOS: Ensure all hardware is running the latest firmware and BIOS.
- Install Latest Drivers: Install the latest drivers for network adapters and storage controllers.
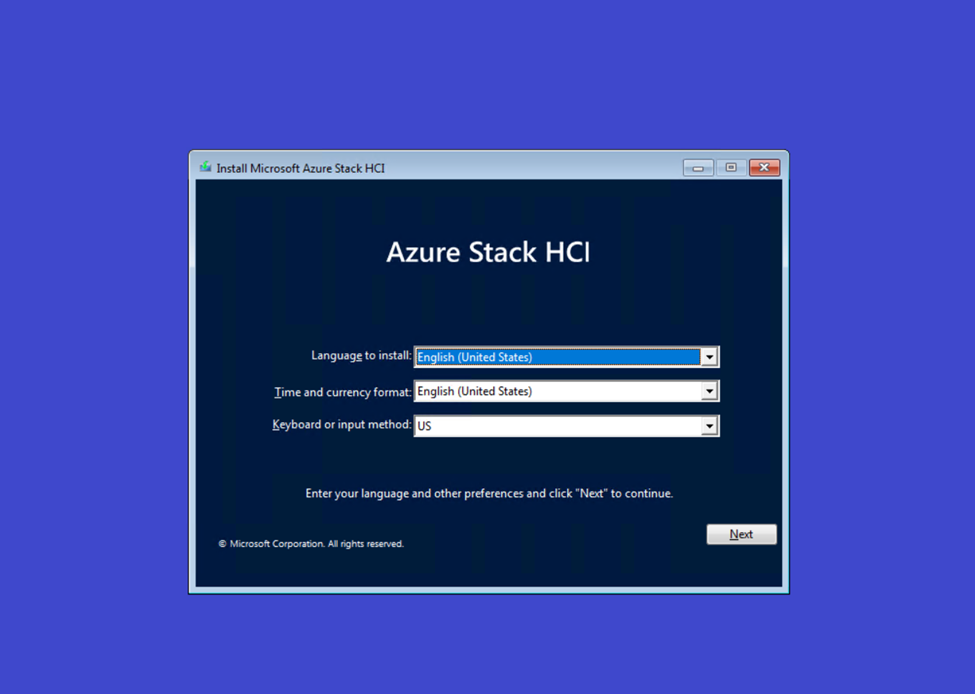
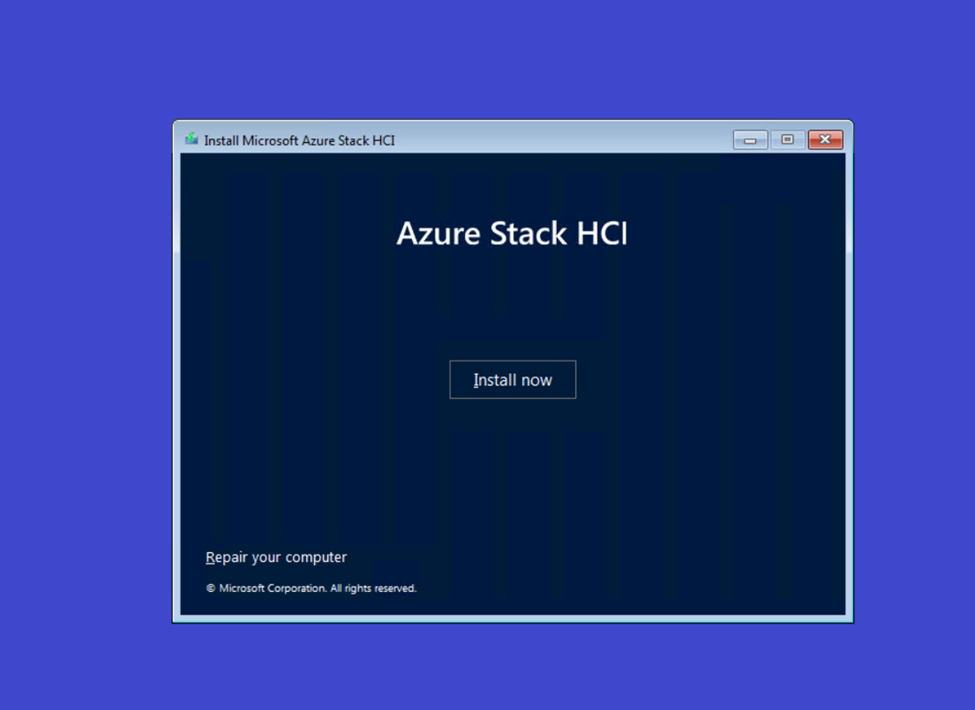
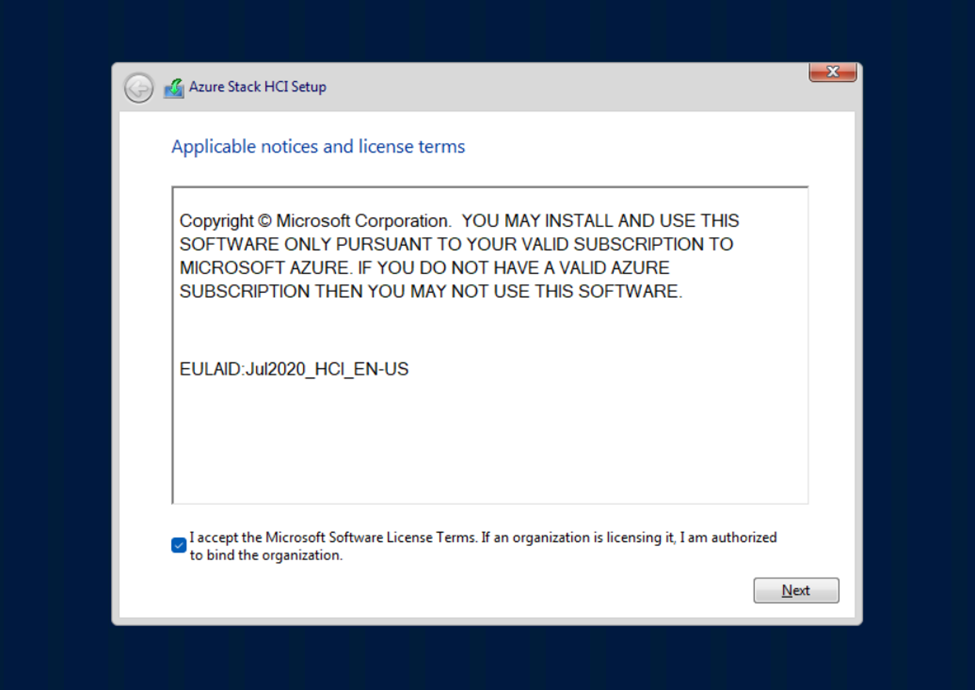
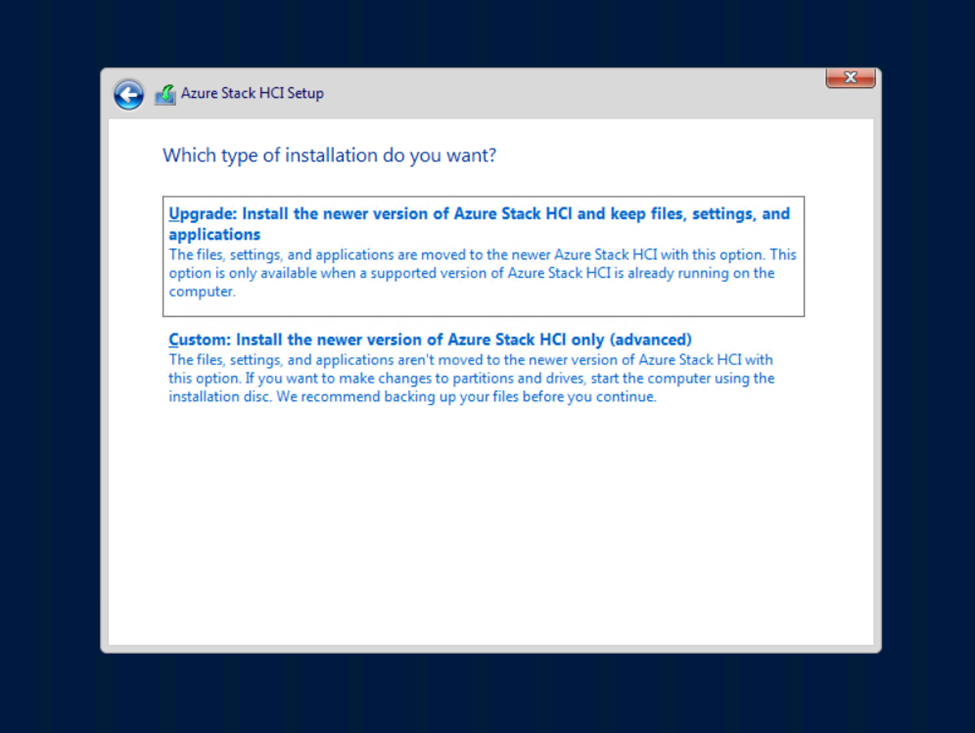
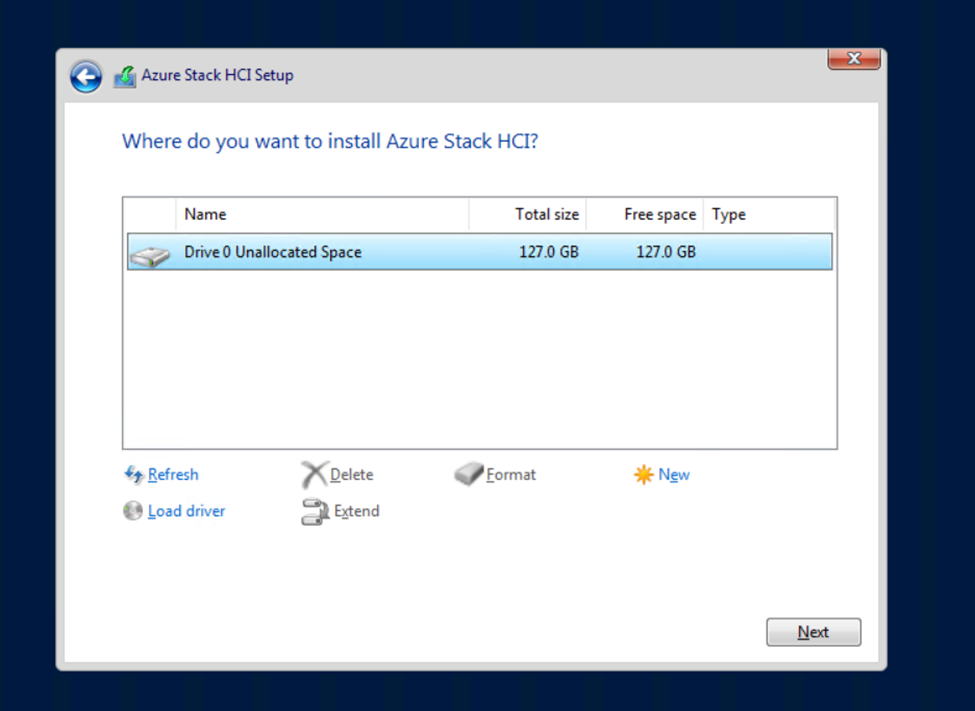
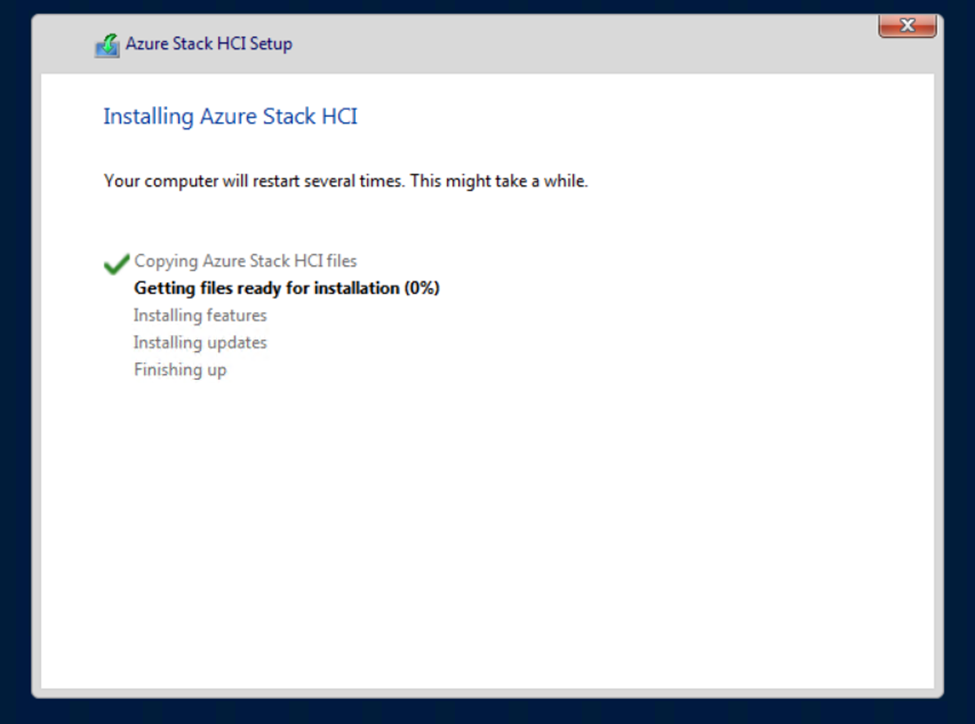
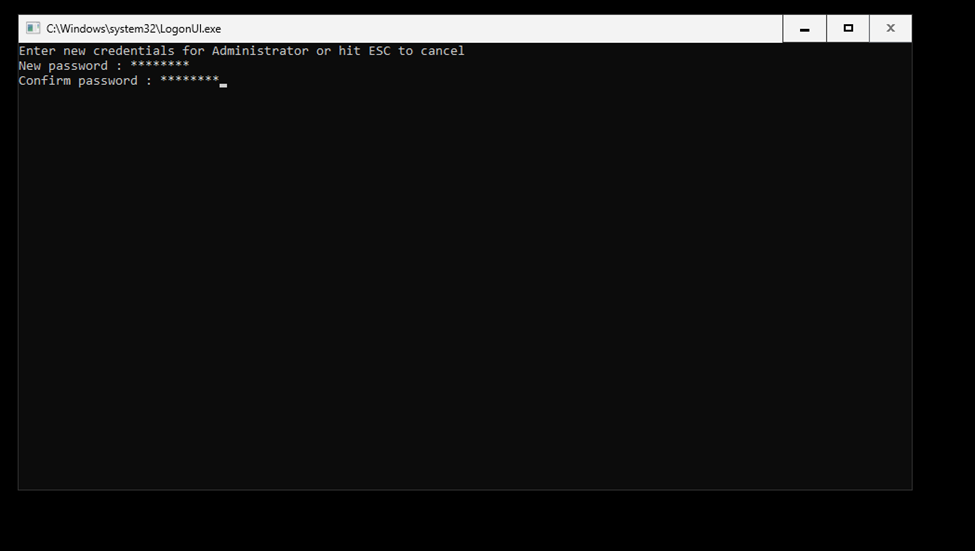
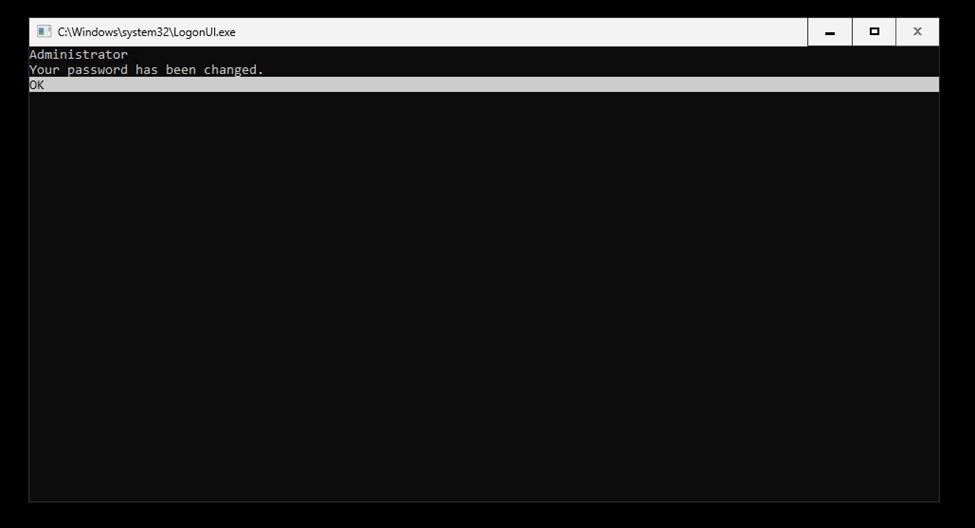
2. Install Windows Server
- Install Azure Stack HCI 22H2 OS: Install Azure Stack HCI 22H2 OS on all nodes.
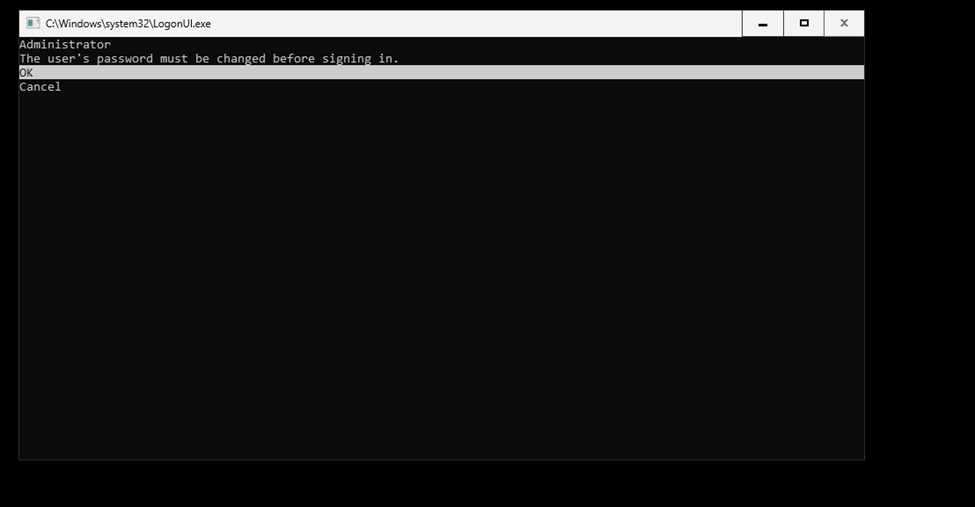
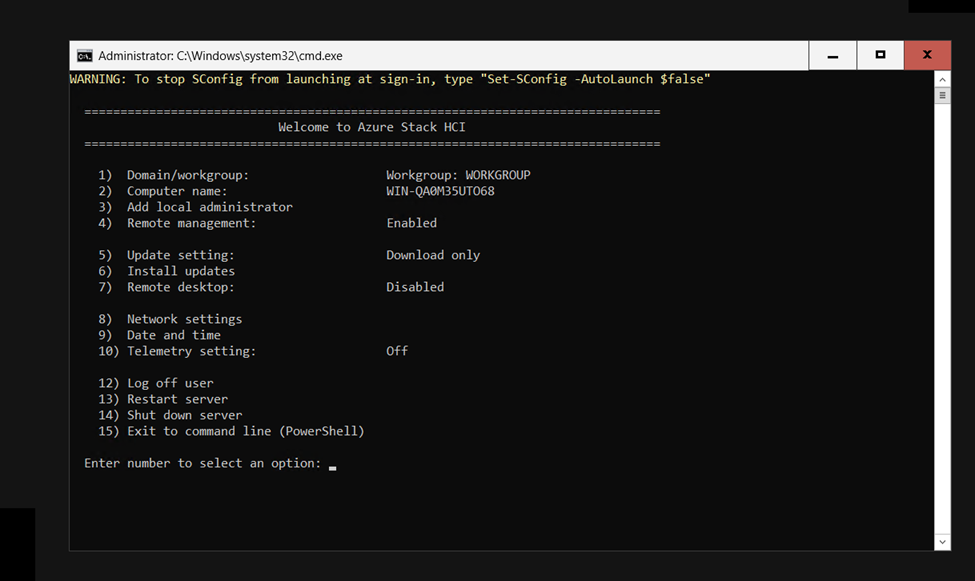
- Initial Configuration:
- Set static IP addresses.
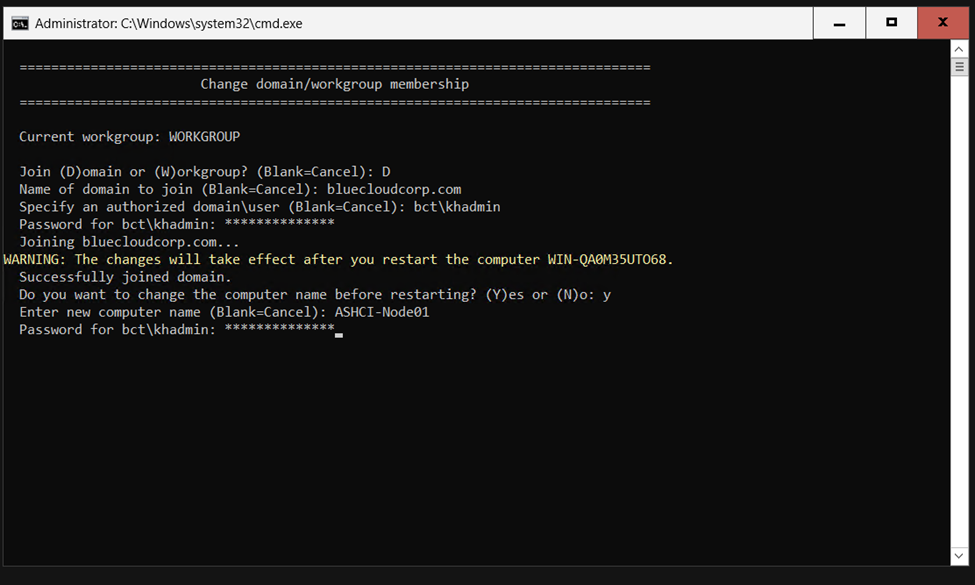
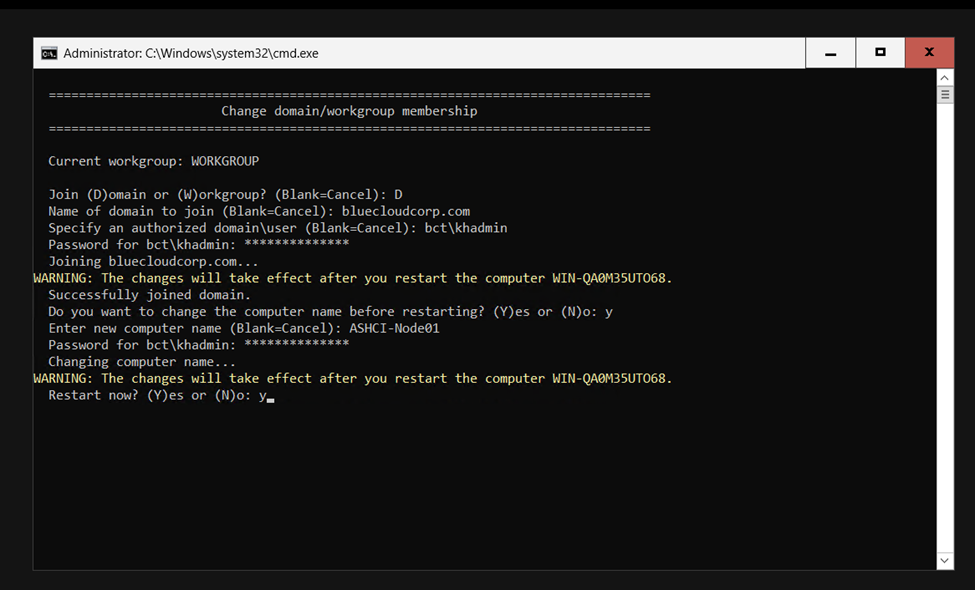
- Join the servers to the domain.
- Install necessary Windows features (Failover Clustering, Hyper-V).
3. Install Windows Admin Center
- Download and Install WAC: Install Windows Admin Center on a management server.
- Add the Cluster: Add the Azure Stack HCI cluster to Windows Admin Center.
4. Configure Networking
- Network Adapters: Configure network adapters for different types of traffic (Management, Storage, VM).
- Switch Embedded Teaming (SET): Configure SET for converged networking.
5. Configure Storage Spaces Direct (S2D)
- Enable S2D:
Enable-ClusterS2D
- Create Storage Pool:
New-StoragePool -FriendlyName “S2DPool” -StorageSubSystem (Get-StorageSubSystem) -PhysicalDisks (Get-PhysicalDisk -CanPool $True)
- Create Virtual Disks and Volumes:
New-Volume -StoragePoolFriendlyName “S2DPool” -FriendlyName “Volume1” -FileSystem CSVFS_ReFS -Size 2TB
6. Configure Cluster
- Create the Cluster:
New-Cluster -Name “ClusterName” -Node “Node1″,”Node2” -StaticAddress “ClusterIP”
- Validate the Cluster:
Test-Cluster
- Add Cluster Disks:
Add-ClusterDisk
7. Register Azure Stack HCI Cluster
- Register the Cluster: In Windows Admin Center, go to the Azure Stack HCI management tool. Select the cluster and click on “Register”. Sign in with your Azure account and complete the registration process.
8. Configure Networking for Azure Stack HCI
- Configure Virtual Switches: Create virtual switches for VM networks.
- Set Up RDMA (if applicable): Configure RDMA for high-performance networking.
9. Deploy and Manage VMs
- Deploy VMs: Use Windows Admin Center or Hyper-V Manager to create and manage VMs on the Azure Stack HCI cluster.
10. Monitor and Maintain
- Regular Monitoring: Regularly monitor the health of your cluster using Windows Admin Center.
- Apply Updates: Apply updates and patches as recommended by Microsoft.
Prepare HCI Nodes:

Start the Create Cluster wizard
To start the Create Cluster wizard in Windows Admin Center:
- Log in to Windows Admin Center.
- Under All connections, click Add.
- In the Add or create resources panel, under Server clusters, select Create new.
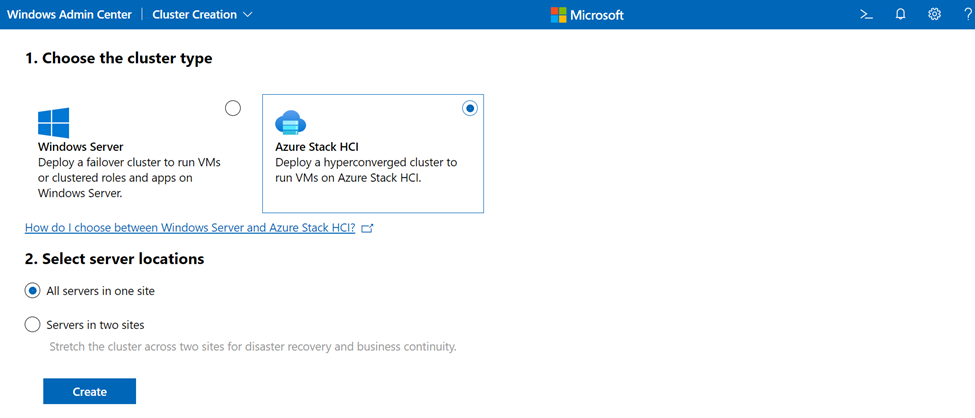
- Under Choose the cluster type, select Azure Stack HCI.
- Under Select server locations, select one the following:
- All servers in one site
- Servers in two sites (for stretched cluster)
- When finished, click Create. You’ll see the Create Cluster wizard, as shown below.

Step 1: Get started
Step 1 of the wizard walks you through making sure all prerequisites are met, adding the server nodes, installing needed features, and then restarting each server if needed.
Review 1.1 Check the prerequisites listed in the wizard to ensure each server node is cluster-ready. When finished, click Next.
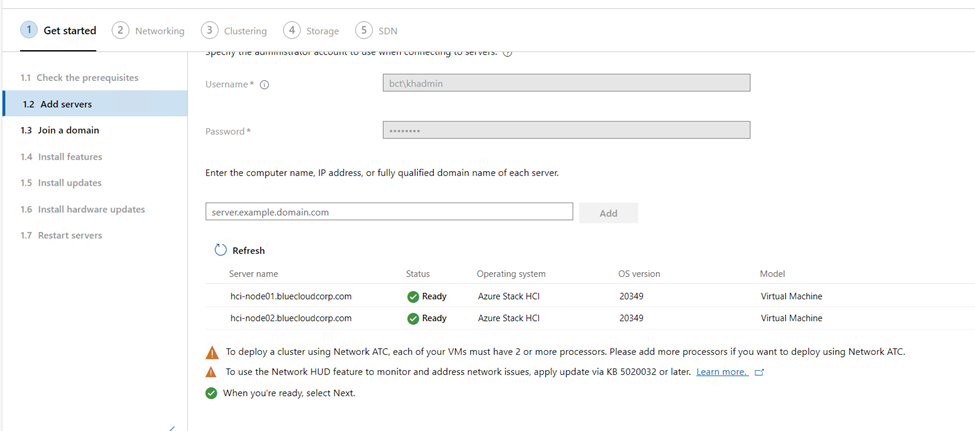
On 1.2 Add servers, enter your account username using the format domain\username. Enter your password, then click Next. This account must be a member of the local Administrators group on each server.
Enter the name of the first server you want to add, then click Add. When you add servers, make sure to use a fully qualified domain name.
Repeat Step 3 for each server that will be part of the cluster. When you’re finished, select Next.
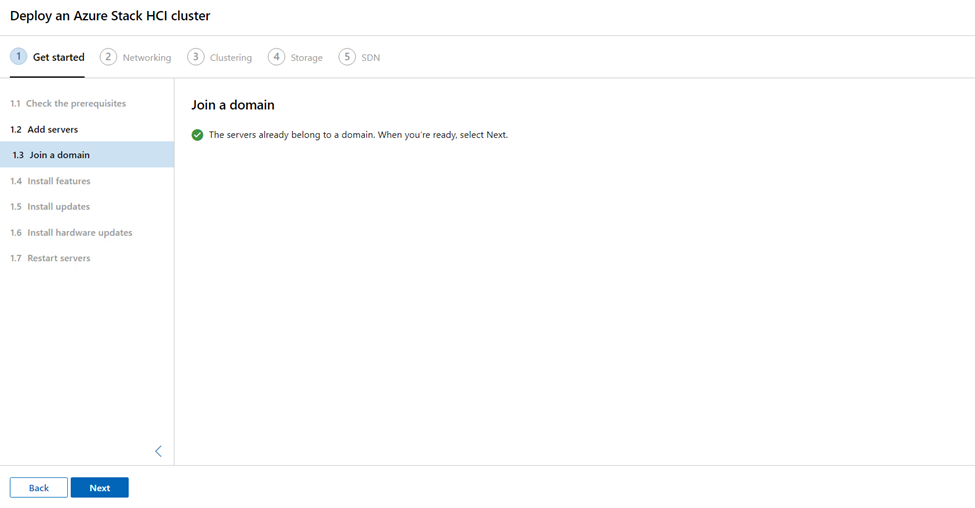
If needed, on 1.3 Join a domain, specify the domain to join the servers to and the account to use. You can optionally rename the servers if you want. Then click Next.
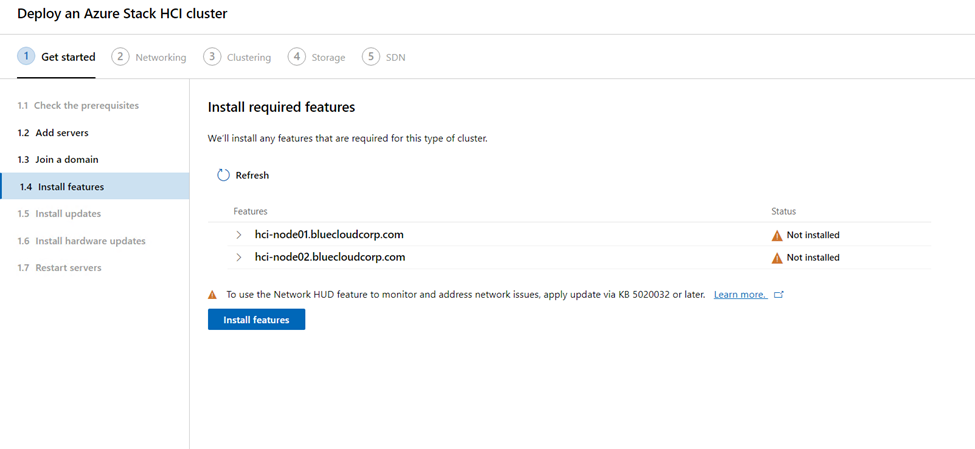
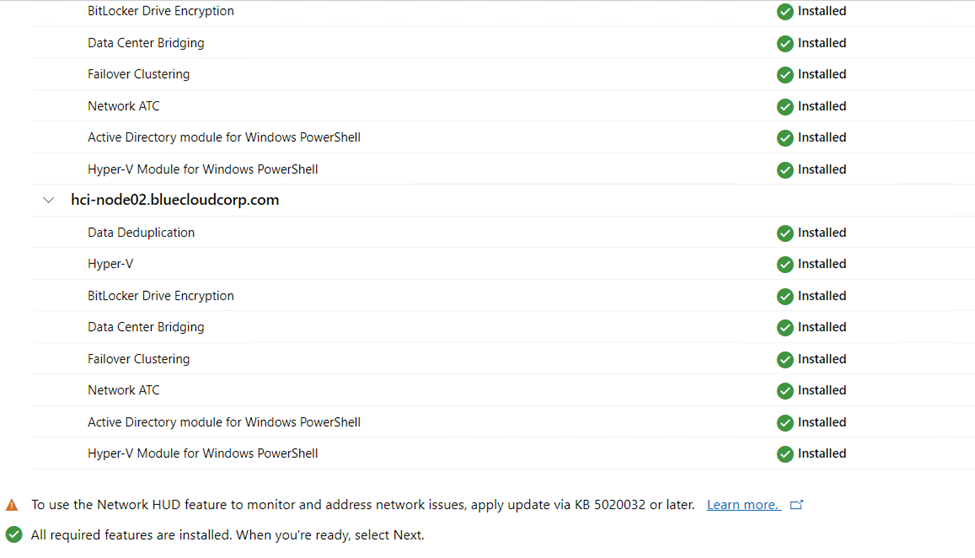
On 1.4 Install features, review and add features as needed. When finished, click Next.
The wizard lists and installs required features for you, including the following options:
Data Deduplication
Hyper-V
BitLocker Drive Encryption
Data Center Bridging (for RoCEv2 network adapters)
Failover Clustering
Network ATC
Active Directory module for Windows PowerShell
Hyper-V module for Windows PowerShell
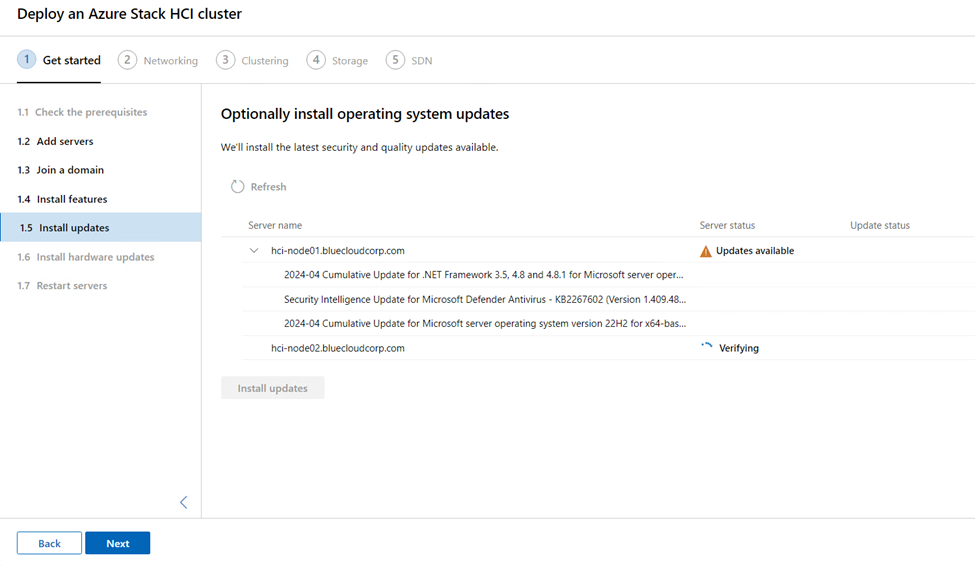
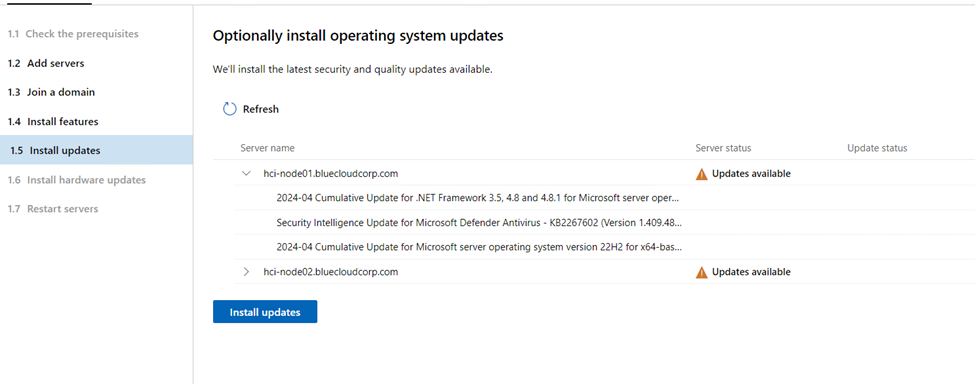
On 1.5 Install updates, click Install updates as needed to install any operating system updates. When complete, click Next.
On 1.6 Install hardware updates, click Get updates as needed to get available vendor hardware updates. If you don’t install the updates now, we recommend manually installing the latest networking drivers before continuing. Updated drivers are required if you want to use Network ATC to configure host networking.
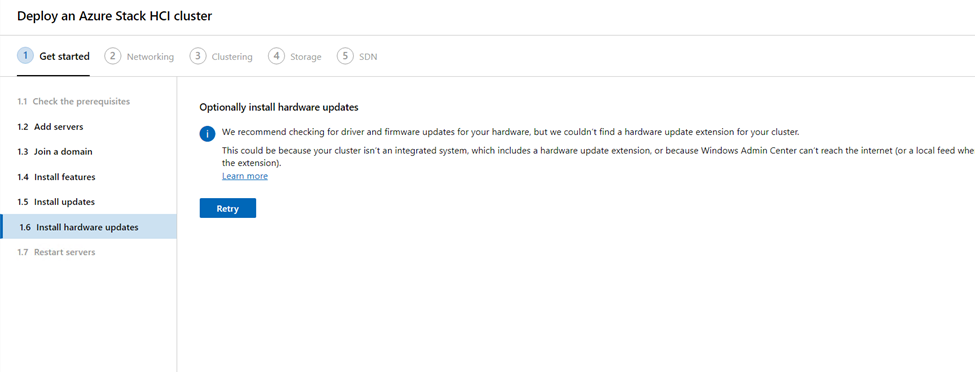
- Follow the vendor-specific steps to install the updates on your hardware. These steps include performing symmetry and compliance checks on your hardware to ensure a successful update. You may need to re-run some steps.
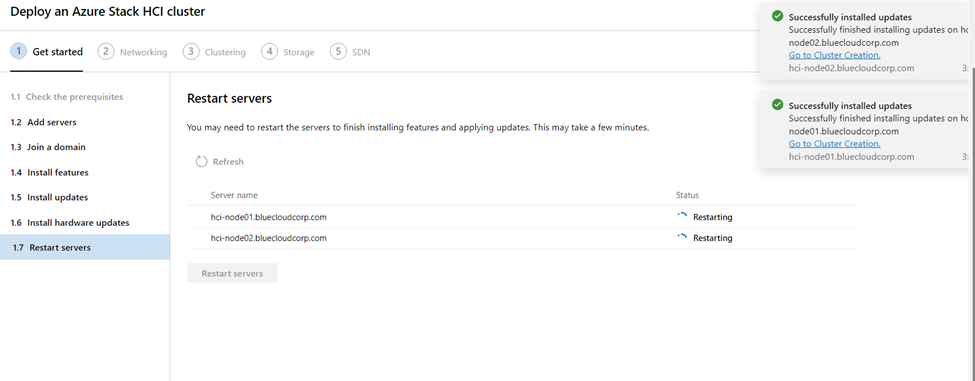
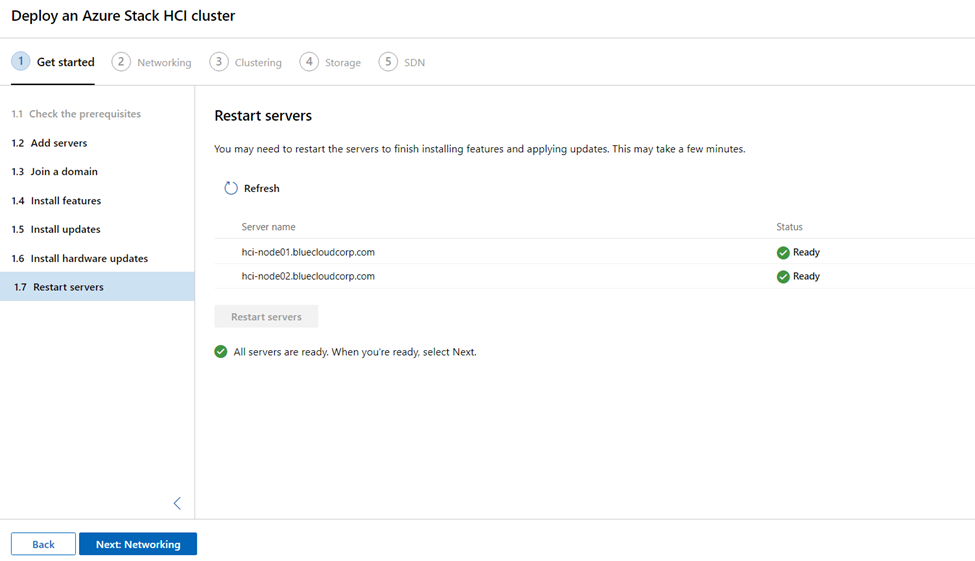
On 1.7 Restart servers, click Restart servers if required. Verify that each server has successfully started.
- On 1.8 Choose host networking, select one of the following:
- Use Network ATC to deploy and manage networking (Recommended). We recommend using this option for configuring host networking. Network ATC provides an intent-based approach to host network deployment and helps simplify the deployment and network configuration management for Azure Stack HCI clusters. For more information about using Network ATC, see Network ATC.
- Manually configure host networking. Select this option to manually configure host networking. For more information about configuring RDMA and Hyper-V host networking for Azure Stack HCI, see Host network requirements.
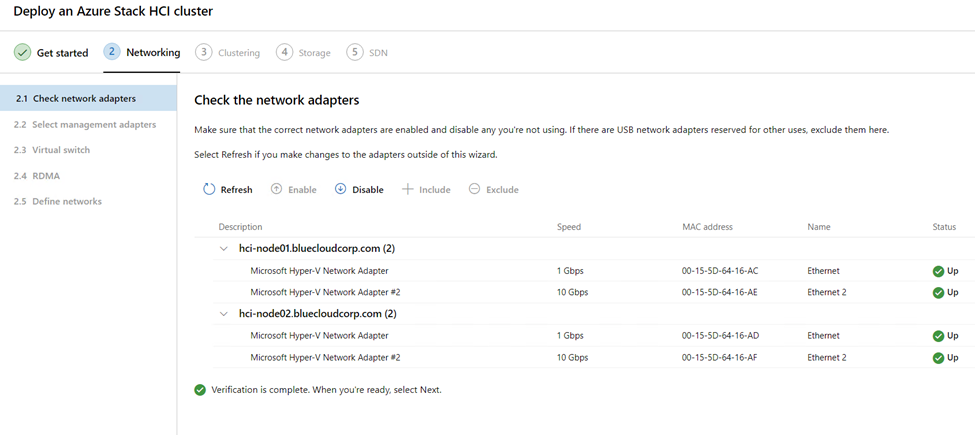
Step 2: Networking
Step 2 of the wizard walks you through configuring the host networking elements for your cluster. RDMA (both iWARP and RoCE) network adapters are supported.
Depending on the option you selected in 1.8 Choose host networking of Step 1: Get started above, refer to one of the following tabs to configure host networking for your cluster:
- On 2.1 Check network adapters, wait until green checkboxes appear next to each adapter, then select Next.
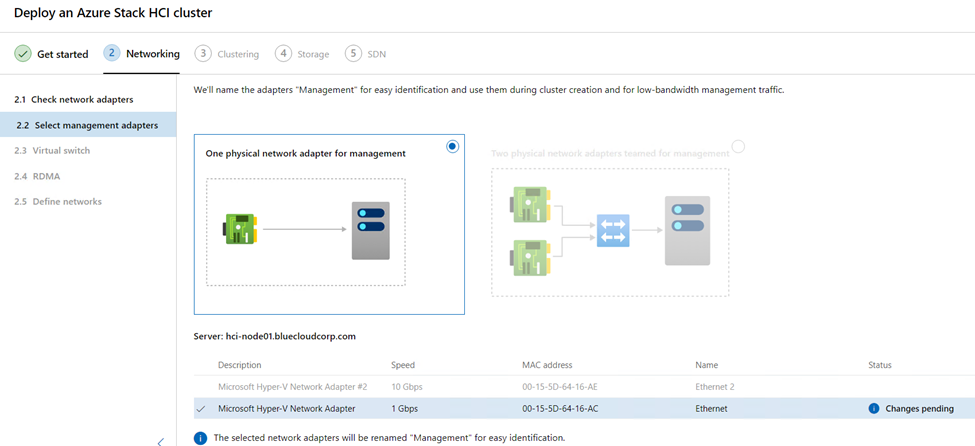
- On 2.2 Select management adapters, select one or two management adapters to use for each server. It is mandatory to select at least one of the adapters for management purposes, as the wizard requires at least one dedicated physical NIC for cluster management. Once an adapter is designated for management, it’s excluded from the rest of the wizard workflow.
Management adapters have two configuration options:
- One physical network adapter for management. For this option, both DHCP or static IP address assignment is supported.
- Two physical network adapters teamed for management. When a pair of adapters is teamed, only static IP address assignment is supported. If the selected adapters use DHCP addressing (either for one or both), the DHCP IP addresses would be converted to static IP addresses before virtual switch creation.
By using teamed adapters, you have a single connection to multiple switches but only use a single IP address. Load-balancing becomes available and fault-tolerance is instant instead of waiting for DNS records to update.
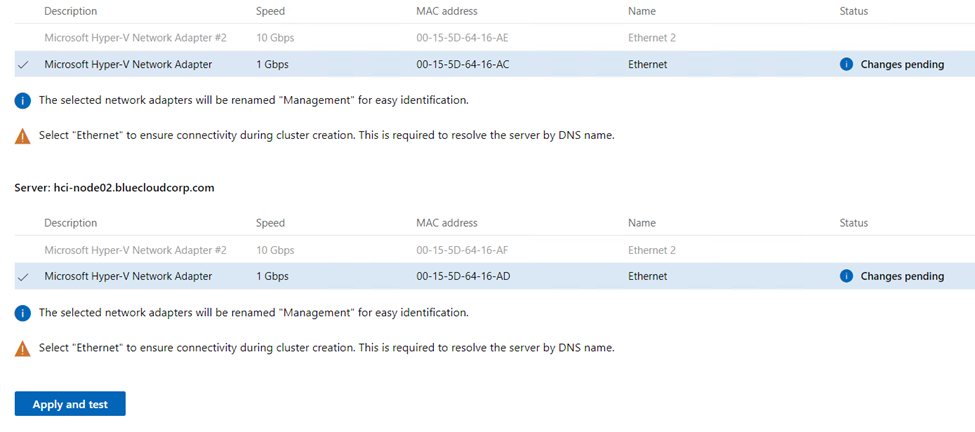
Now do the following for each server:
- Select the Description checkbox. Note that all adapters are selected and that the wizard may offer a recommendation for you.
- Clear the checkboxes for those adapters you don’t want used for cluster management.
When changes have been made, click Apply and test.
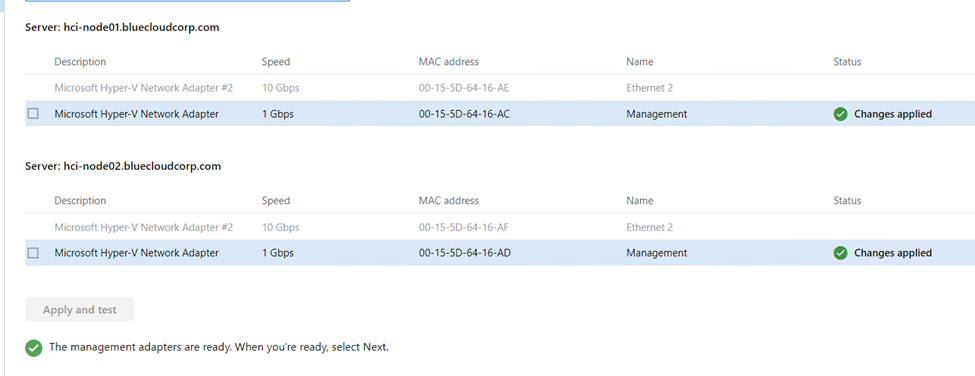
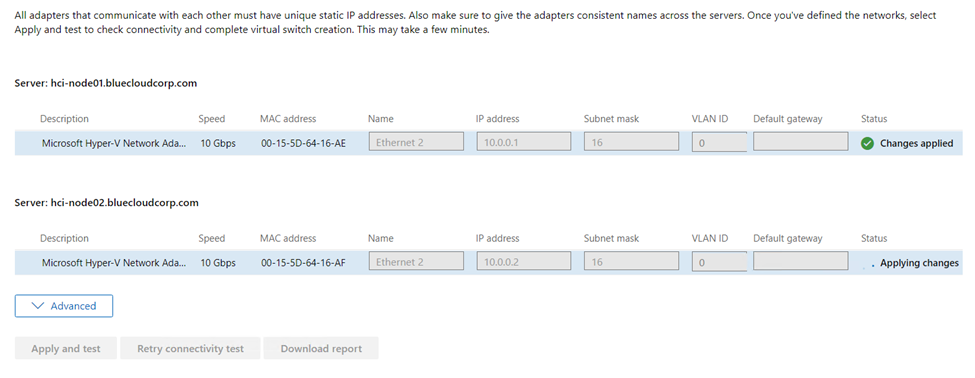
Under Define networks, make sure each network adapter for each server has a unique static IP address, a subnet mask, and a VLAN ID. Hover over each table element and enter or change values as needed. When finished, click Apply and test.
- Wait until the Status column shows Passed for each server, then click Next. This step verifies network connectivity between all adapters with the same subnet and VLAN ID. The provided IP addresses are transferred from the physical adapter to the virtual adapters once the virtual switches are created in the next step. It may take several minutes to complete depending on the number of adapters configured.
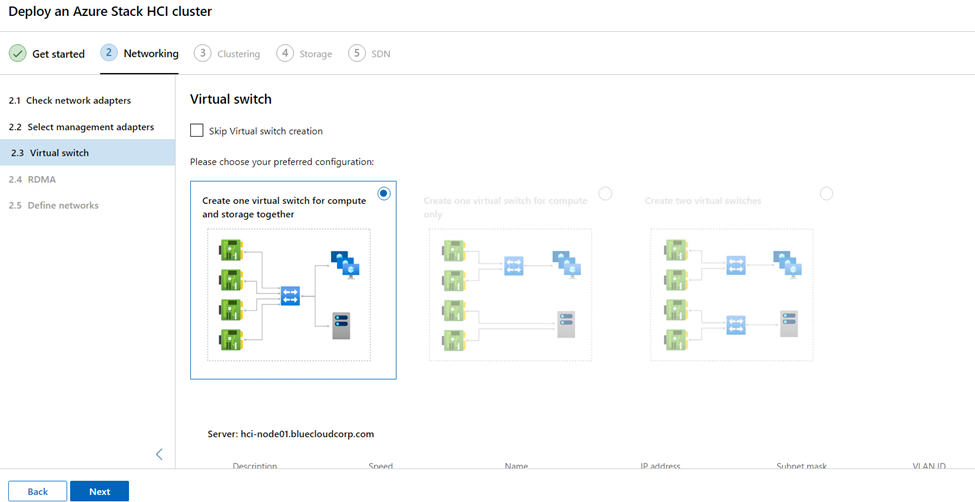
Under 2.3 Virtual switch, select one of the following options as applicable. Depending on how many network adapters there are, not all options may be available:
- Skip virtual switch creation – choose if you want set up virtual switches later.
- Create one virtual switch for compute and storage together – choose if you want to use the same virtual switch for your VMs and Storage Spaces Direct. This is the “converged” option.
- Create one virtual switch for compute only – choose if you want to use a virtual switch for your VMs only.
- Create two virtual switches – choose if you want a dedicated virtual switch each for VMs and for Storage Spaces Direct.
- The following table shows which virtual switch configurations are supported and enabled for various network adapter configurations:
| Option | 1-2 adapters | 3+ adapters | teamed adapters |
| single switch (compute + storage) | enabled | enabled | not supported |
| single switch (compute only) | not supported | enabled | enabled |
| two switches | not supported | enabled | enabled |
- Change the name of a switch and other configuration settings as needed, then click Apply and test. The Status column should show Passed for each server after the virtual switches have been created.
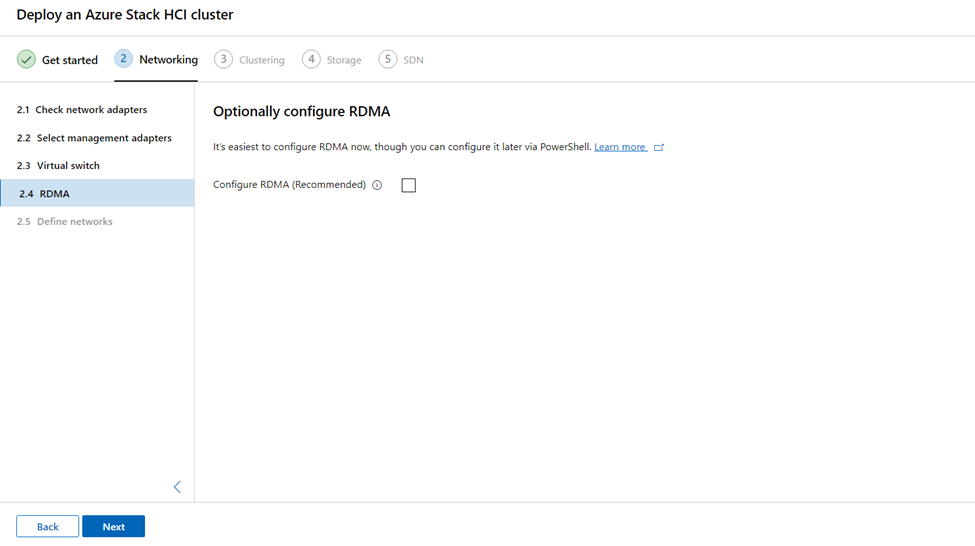
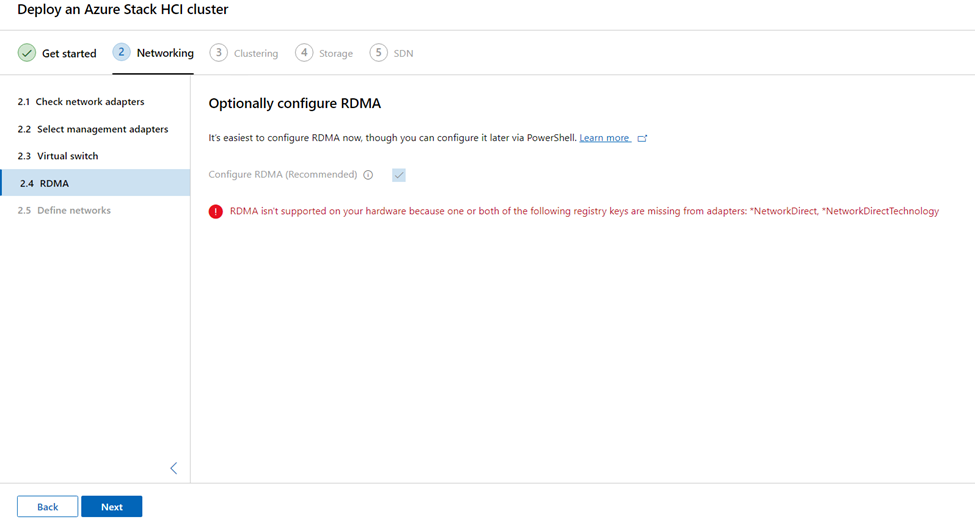
- Step 2.4 RDMA is optional. If you’re using RDMA, select the Configure RDMA (Recommended) checkbox and click Next.
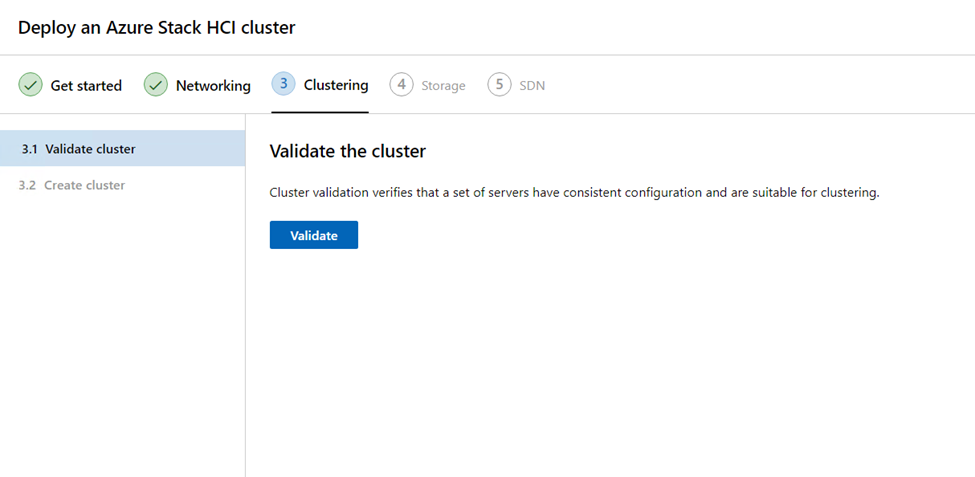
- On 3.3 Validate cluster, select Validate. Validation can take several minutes. Note that the in-wizard validation is not the same as the post-cluster creation validation step, which performs additional checks to catch any hardware or configuration problems before the cluster goes into production.
- If the Credential Security Service Provider (CredSSP) pop-up appears, select Yes to temporarily enable CredSSP for the wizard to continue. Once your cluster is created and the wizard has completed, you’ll disable CredSSP to increase security. If you experience issues with CredSSP, see Troubleshoot CredSSP.
- Review all validation statuses, download the report to get detailed information on any failures, make changes, then click Validate again as needed. You can Download report as well. Repeat again as necessary until all validation checks pass. When all is OK, click Next.
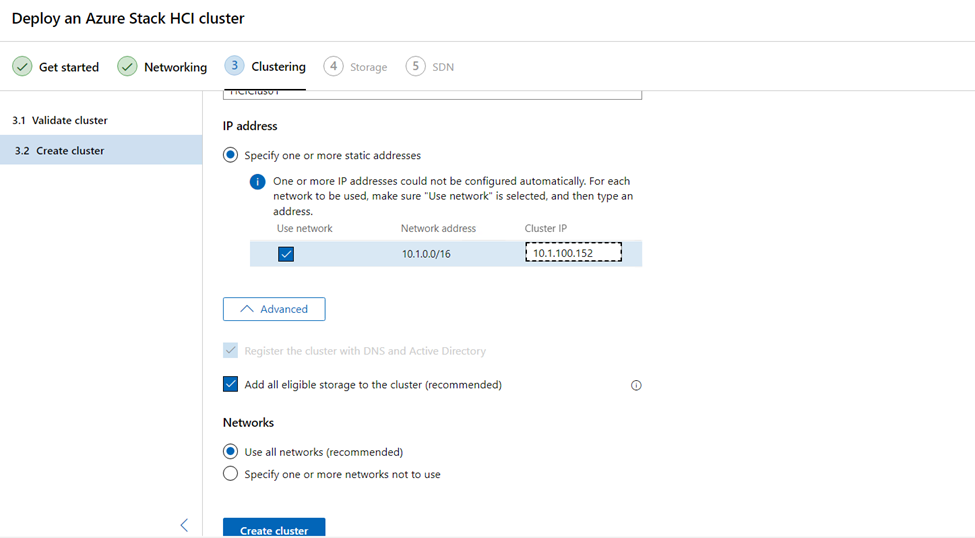
- Select Advanced. You have a couple of options here:
- Register the cluster with DNS and Active Directory
- Add eligible storage to the cluster (recommended)
- Under Networks, select whether to Use all networks (recommended) or Specify one or more networks not to use.
- When finished, click Create cluster.
- For stretched clusters, on 3.3 Assign servers to sites, name the two sites that will be used.
- Next assign each server to a site. You’ll set up replication across sites later. When finished, click Apply changes.
- Select Next: Storage to proceed to Step 4: Storage.
Step 3: Clustering
Step 3 of the wizard makes sure everything thus far is set up correctly, automatically sets up two sites in the case of stretched cluster deployments, and then actually creates the cluster. You can also set up your sites beforehand in Active Directory.
- On 3.1 Create the cluster, specify a unique name for the cluster.
- Under IP address, do one of the following:
- Specify one or more static addresses. The IP address must be entered in the following format: IP address/current subnet length. For example: 10.0.0.200/24.
- Assign address dynamically with DHCP.
- When finished, select Create cluster. This can take a while to complete.
If you get the error “Failed to reach cluster through DNS,” select the Retry connectivity checks button. You might have to wait several hours before it succeeds on larger networks due to DNS propagation delays.
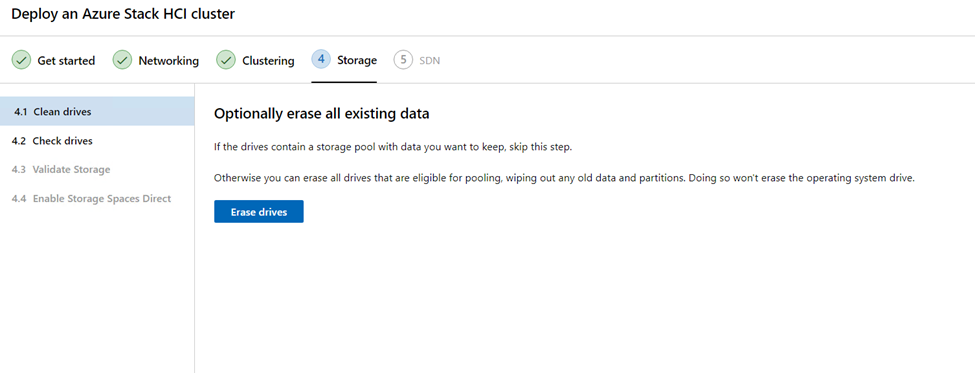
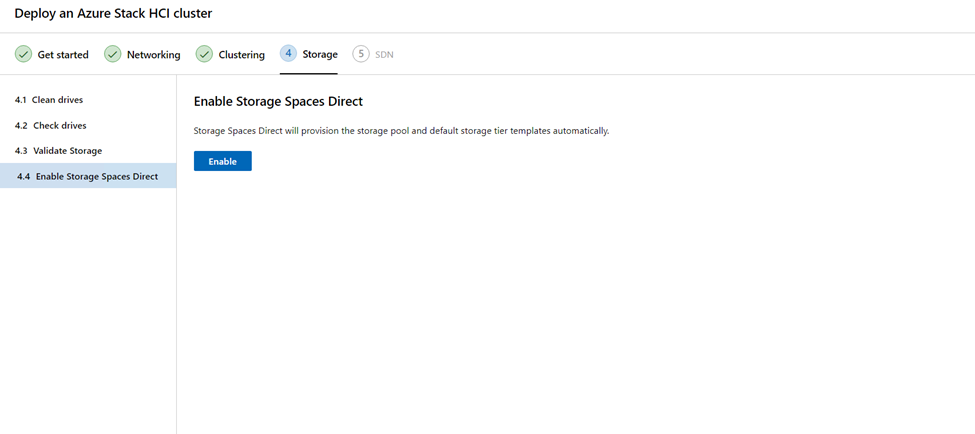
Step 4: Storage
Complete these steps after finishing the Create Cluster wizard. Step 4 walks you through setting up Storage Spaces Direct for your cluster.
- On 4.1 Clean drives, you can optionally select Erase drives if it makes sense for your deployment.
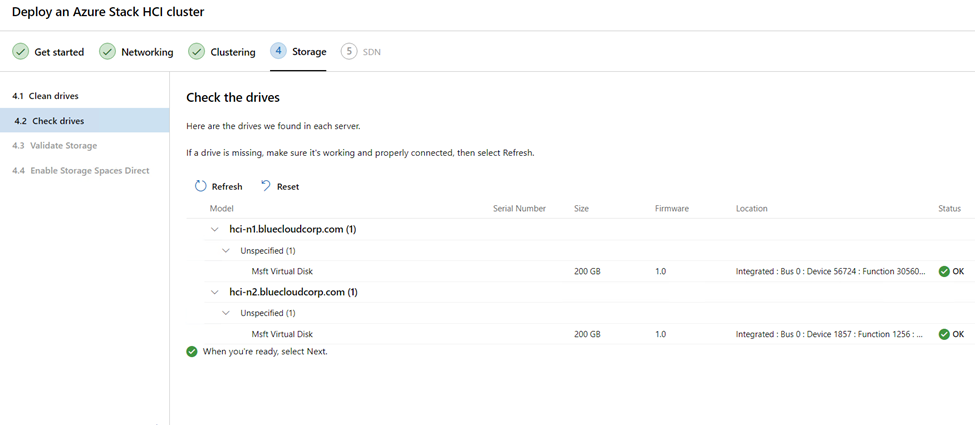
- On 4.2 Check drives, click the > icon next to each server to verify that the disks are working and connected. If all is OK, click Next.
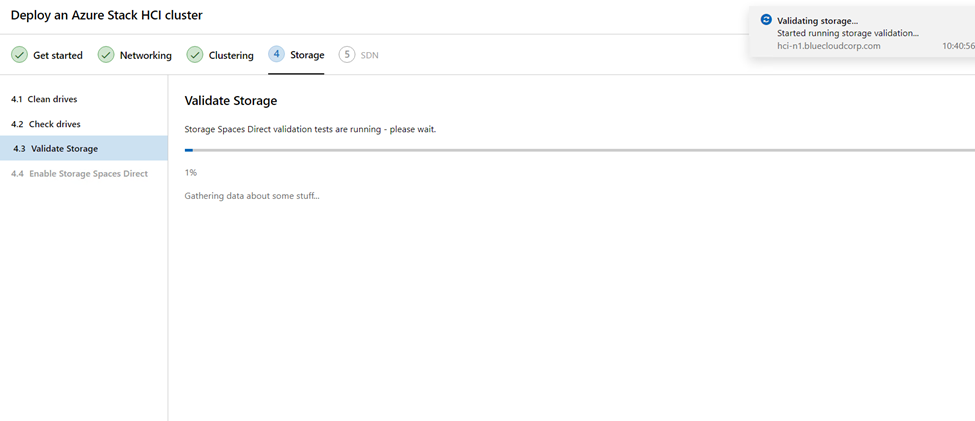
- On 4.3 Validate storage, click Next.
- Download and review the validation report. If all is good, click Next. If not, run Validate again.
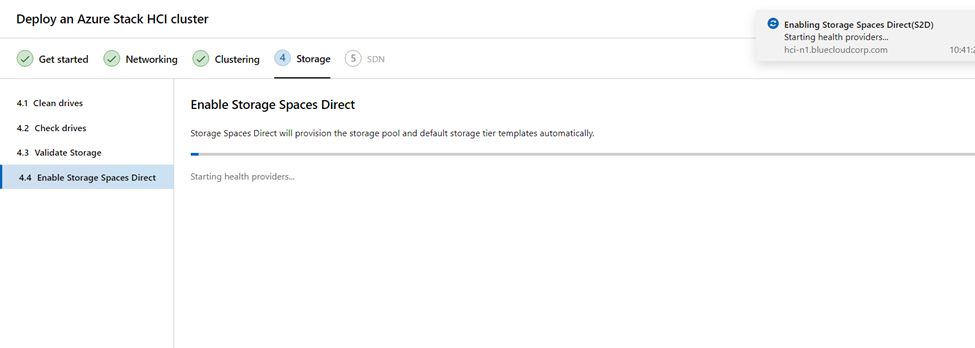
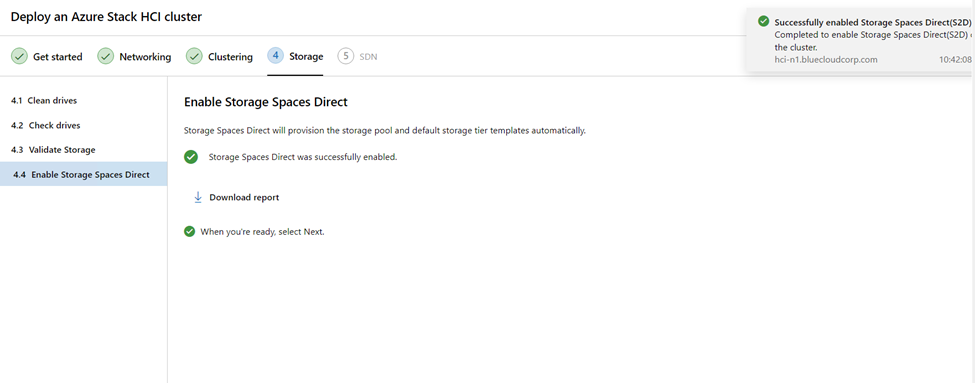
- On 4.4 Enable Storage Spaces Direct, click Enable.
- Download and review the report. When all is good, click Finish.
- Select Go to connections list.
- After a few minutes, you should see your cluster in the list. Select it to view the cluster overview page.
It can take some time for the cluster name to be replicated across your domain, especially if workgroup servers have been newly added to Active Directory. Although the cluster might be displayed in Windows Admin Center, it might not be available to connect to yet.
If resolving the cluster isn’t successful after some time, in most cases you can substitute a server name instead of the cluster name.
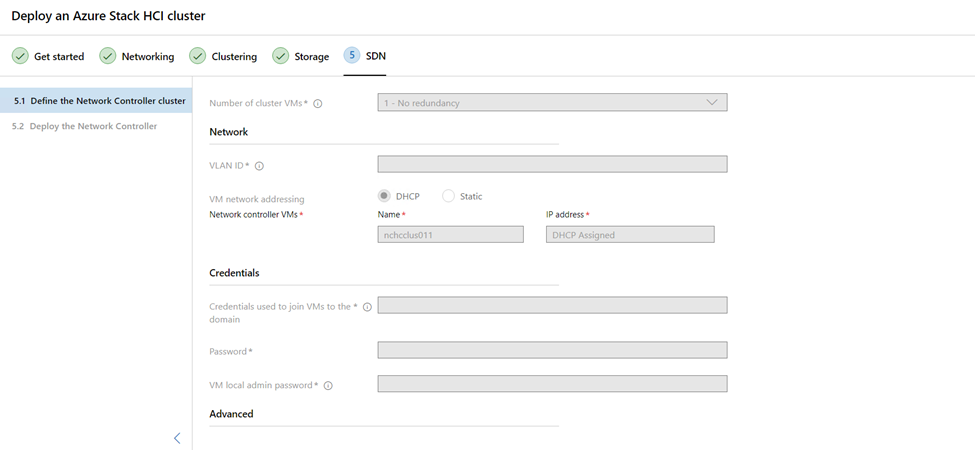
Step 5: SDN (optional)
This optional step walks you through setting up the Network Controller component of Software Defined Networking (SDN). Once the Network Controller is set up, you can configure other SDN components such as Software Load Balancer (SLB) and RAS Gateway as per your requirements. See the Phased deployment section of the planning article to understand what other SDN components you might need.
You can also deploy Network Controller using SDN Express scripts. See Deploy an SDN infrastructure using SDN Express.
Wait until the wizard completes its job. Stay on this page until all progress tasks are complete. Then click Finish.
Next Post we will go through registering with Azure Arc and proceeding with Windows Admin Center operations.
I hope this was informative for you, please let me know your comments.
See you soon
Karim Hamdy
Infrastructure Architect
